

Acting For Animation – Observation
So what do you need to do to make your performance better?
So last time we looked at what you need to consider when preparing yourself as a character animator by unpicking the basics of the acting process. But of course there’s more to it than that! Animation is not just simple movements fractured frame by frame. It’s a science and it’s an illusion. Acting for animation to create plausible characters means you need to be able to empathise with the dialogue (if there is any of course) in such a way that your movements match them and allow the audience to believe what they are seeing, and your ability to interpret script directions. Underpinning all this will be your ability to observe from life, to dissect gestures and movements and to reassemble these within the animation.
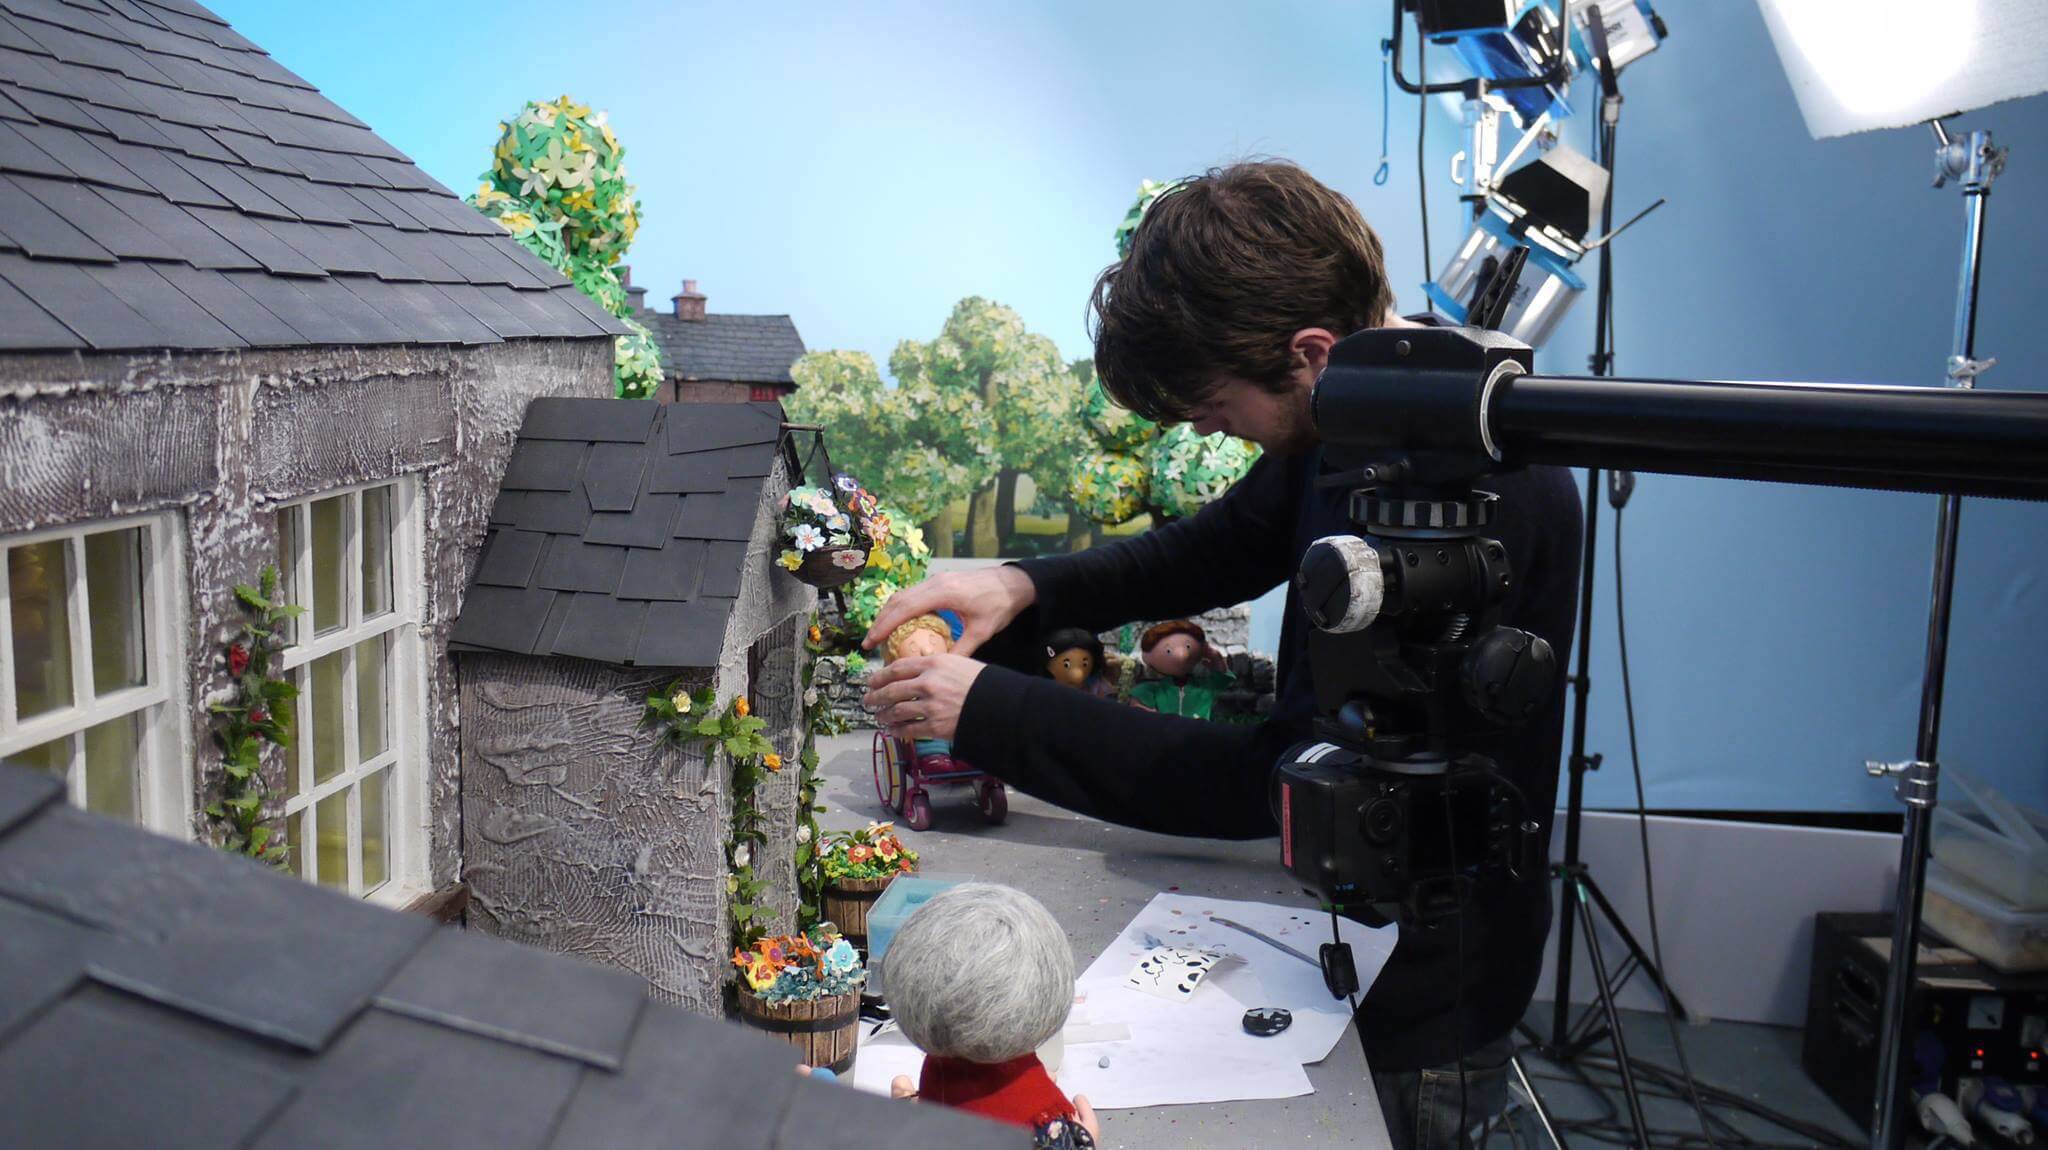
Photo: Bob Scott. Still from ‘Postman Pat’ (Cosgrove Hall Films). Animating several characters at once can really give the animator lots to think about. Here it helps if the animator works on each character in turn, and to do the same every frame.
At all times you should be observing. You need to be a people watcher. A good animator should study from real life where you will be presented with a never ending cast of characters all with their own set of stock gestures. But another great way to study movement comes from studying the way in which actors move. A common failing in many fledgling character animations is that movements are twinned – that is when two elements start and end their movements simultaneously – this is most noticeable when a character shrugs. Acute observation from reality will show you that this doesn’t occur; rather there will be a slight delay in that shrug of a frame or two from one shoulder to the next. Such a subtlety whilst imperceptible at first does lend itself to a better performance. This applies to all movements from a character.
I believe that all movements begin with what I call ‘motivators’.
What is a motivator then, and how do you spot one? Well by spending time acting out the movements of a character prior to filming it you should be able to observe how and why movements start. This helps you fix the movement in your mind. Look at the trajectory that the movements follow, the shape that they make at any given point and crucially, the end pose making this the most elegant and readable position possible (think of it a bit like ballet!). So to work out what that motivator is you should look at where that movement starts, at the very first thing that moves. Take a wave for example. From a neutral standing pose, with the arms hanging loosely by the side of the body you can see that the movement begins in the wrist as the hand and arm start their journey. Now the simple laws of physics should also be borne in mind, and with this as the wrist moves away from the body there should also be a reciprocal movement of the hand towards the body. Remember – every action has an equal and opposite reaction. This subtlety should give the appearance of the tips of the fingers remaining in place. So, in this instance for a wave the motivator can be identified as the wrist. It is this that starts or motivates the movement. Each element of the arm, from the fingers through to the shoulder set off at different times starting from the wrist and this staggering of movement needs to be offset by a few frames each time. To create a believable movement you also need to be aware of the impact of even small movements on other parts of a body. So continuing with the wave as the arm reaches up and the shoulder lifts there will be tilt from the hips to compensate for the shift of weight. This will mean that the upper body tilts slightly away from the arm that is rising. This in turn will also impact on the inclination of the head, which should lean towards the rising arm – the body is trying to keep the head balanced and level. You might also want to think about where the feet are in all of this. Perhaps they shift wider apart so that the body has a firmer base from which to set off with this movement. Maybe you thought that a wave simply involved flapping a hand around a bit, but with careful observation we can see that there is a whole lot more to it.
As an animator you can choose to observe movements in a number ways. Direct observation is by far and away the best method, and you can do this by using a mirror or by videoing the action and replaying it. I would always urge you to use a mirror as it will teach you through direct observation but more importantly, how the movement ‘feels’. It’s almost as if you are building in a sort of muscle memory and by acting it out you also get to feel where your balance shifts, feel what those motivators are. By directly copying the movement from a video you can find that you become too rigidly tied to the specifics of a movement which in turn can restrict the room for creative exploration. However there are times when it’s impossible for you to act out the things you want to animate – jumping and falling from a height, flying, or any number of action moves, or if you have to animate an animal. Here you may well have to rely on reference material from other sources. When I first started animating I found it really helpful to go through films frame by frame and seeing just how long things took. If you’re new to the craft you will be surprised just how long some things take to occur, and it’s important to get that understanding early on. So if you are using video reference of yourself, something that you have found in a film or maybe you have researched this a bit and found the ideal clip online use this as your starting point to get the timing and basic positions mapped out. But don’t forget to let your imagination and creativity loose on it too. This is what will help to distinguish you as a proper character animator.
Your observation should go beyond the realm of purely analysing the physics of a single movement and you need to understand a range of gestures and reactions that relate to mood, sex, social ranking, temperament and age for example. A skilled character animator needs to be a consummate actor as well as an animator. Again, close observation aids this but it needs to be combined with empathy. You should be constantly asking questions. Ask the how, why, what and when questions. How old are they, what sex are they, what is their status, what mood did they appear to be in, how many people are with them. This builds up a general idea of how people react to a given set of internal and external stimuli, and from this you can start to act out the scene. But don’t just leap in after you think you have the answers. You need to rehearse.
Character Animation – Rehearsal
The act of rehearsal is paramount when striving to achieve a high quality of performance with animation. The main reason for this is because you might only get one opportunity to get it right. When I animated on children’s programmes this was the case. I had a script, a storyboard and direction and had to deliver a certain number of seconds per day. And it had to be good! Occasionally I had the opportunity to block out my animation if I was shooting a film or commercial. This meant that I could position my character every 10 frames to get a feel for the shot, then maybe move on to doubles (shooting two frames per move) and finally shooting for real. But whether I was preparing like this or not I still had to rehearse. This is critical with stop motion animation as it is a linear form of production where every frame has to be perfect. Traditional 2D allows you to be clean up the line tests before filming and CG works in a similar way with key frames and an on-going process of cleaning up.
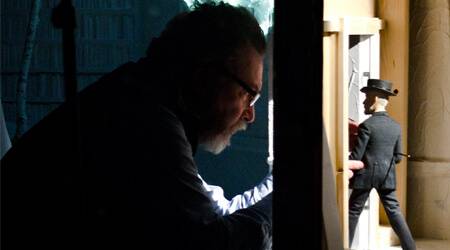
Photo: Darren Walsh. Still from ‘Angry Kid’ (Aardman Animations). Director Darren Walsh on set with one of the many characters from his series ‘Angry Kid’. Rehearsing the shots here is vital, particularly as it involved real people. But the process of rehearsing for your animated characters is just the same. The more you practice the better the performance!
Once you’ve been given your directions and dialogue, if necessary, then the process of rehearsal begins. This happens in much the same way as it does for film and the stage. Each scene will have been blocked by the director at the storyboard stage, so that each character should have their own eye-line and position in the setting. You need to be aware of these at all times. In stop frame you might not have all the characters from the scene you are animating on set with you, so the character you are animating may well be looking out into space – but you have to remember to keep that eye line right, just as if the other character was there. It’s a similar thing for 2D animation, though with CG you have the slight advantage of being able to have that other character just stood out of shot. The rehearsal process unfolds as you work with the directions and/or the dialogue. It is essential at this point that you imagine yourself in the scene. The rise and fall of the speech should help you shape the movement in your mind. It is advisable to write these thoughts down on the script, or if you have one, a dope sheet. You should aim to hit these points with the biggest movement in the sequence, so if you know what frame that is on you can work backwards from that, working with your timings as see when you need to get that move started. More often than not too many gestures and movements will come to mind, and so you will need to simplify this so that the shot is not littered with movements. It is crucial that no one shot should ever be seen in isolation, it’s part of a series, and it’s also the skill of a good character animator to look at the shots around the one that is being animated and make a critical judgement as to how many and what type of movement and gesture to use. It is also essential for you to remember that the poses achieved need to be read, and for this they need to be allowed to rest periodically.
Importantly the process of rehearsal will allow you to understand the performance area, the delineation of the frame and its constraints. It is vital that your character occupies the frame in such a way that it maintains it’s position of power or subservience, and on a purely practical level, without the use of moving cameras, for the character to remain in shot. Even with a moving camera it is vital that the animator knows where to stage the action. This helps to define and sometimes constricts the movements that have been identified and refined through the rehearsal period through to the final filmed sequence.
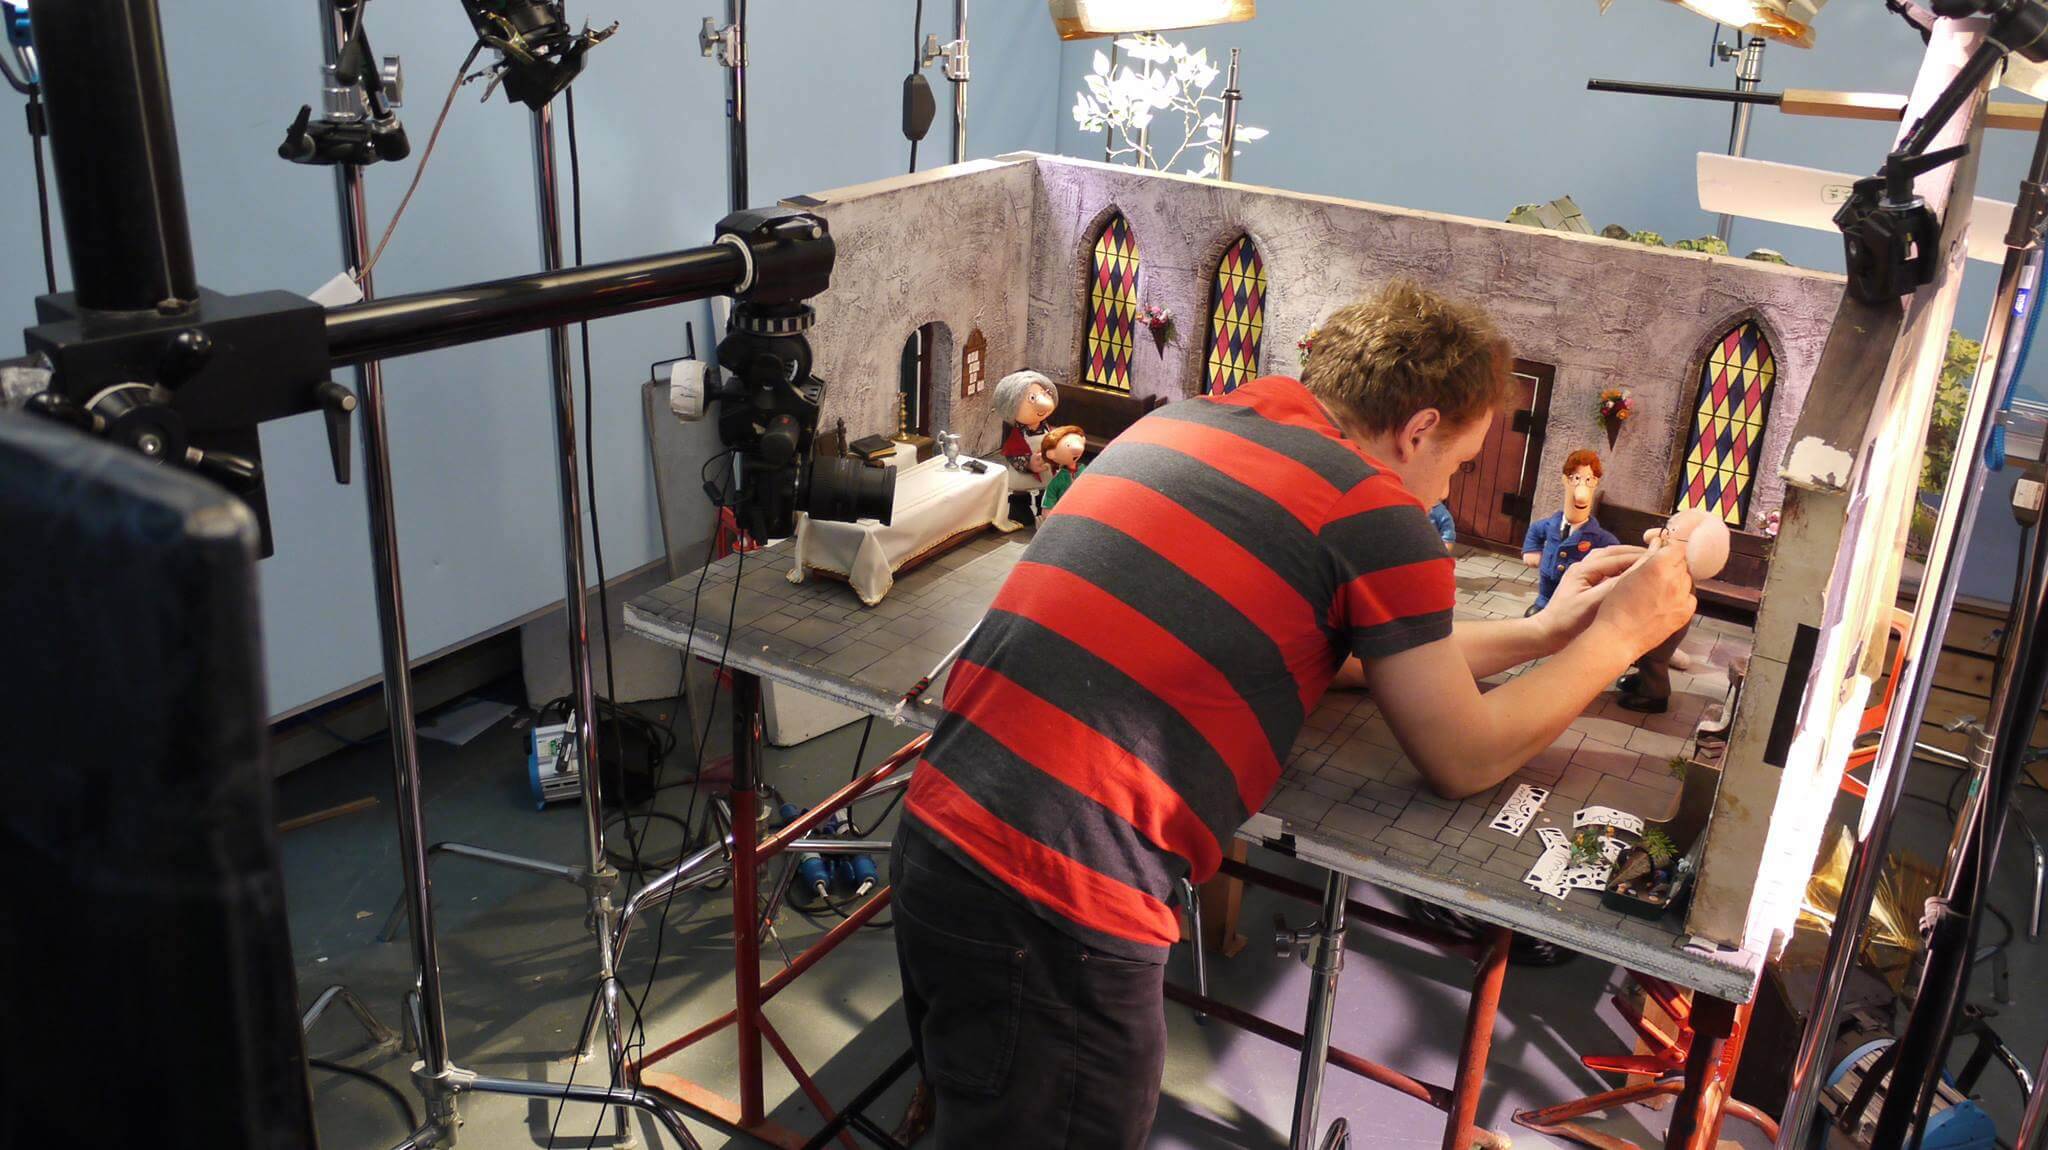
Photo: Bob Scott. Still from ‘Postman Pat’ (Cosgrove Hall Films). When your working with a group scene like this you need to be aware of the eyelines of all the character – particularly those that are out of shot, otherwise your shots wont cut together when it comes to the edit!
Once you’ve got an idea of the range and type of movements that you want then it’s time for the rehearsal process to begin. Pay close attention to each aspect of the movements, observe time and again the motivators, to feel which muscles are moving and to what extent, look at the paths that they follow and the shapes they form and when things come to a stop and in which order. This will also give you the chance to do something else. The opportunity to time the movements. Timing is essential. Timing is everything.
Character Animation – Timing
Although I have stressed how important understanding character and performance are, that knowledge of movement is vital and that is necessary to rehearse, your animation will fall apart if you don’t get the timing right. This is an absolute for all animation, and for character animation everything hinges on whether your animation is believable or not. A few frames too many and a gesture can appear ponderous and too slow. A few frames too few and a gesture will appear rushed and ill-judged. The key to timing is to repeat the movement or gesture several times and get an average. You’ll be doing this as you rehearse, so as you do that make a note of the timings too. It may be necessary to break down the movement into separate elements and to time these individually, in which case it is important that you keep a record of these timings in the form of a dope sheet that can be cross-referenced as the animation is produced. Even though each frame constitutes 1/25th of a second their individual contribution to a movement can be appreciated, which is certainly evident in an action like a blink. A good rule of thumb is to have 2 frames on the down, 2 frames holding closed and 2 – 3 frames on the up. If one frame is removed from the hold then the effect on the blink renders it unbelievable. Eventually and with practice a skilled character animator can recreate gestures and movements that lend to a great performance without having to resort to using a stop-watch. But if you are just starting out then I would suggest that you work with one all the time. Unfortunately your average stopwatch doesn’t work in 25th of a second so you will need to do some simple maths.
Remember that each 0.1 of a second is 2.5 frames (each second is divided into tenths, and there are 25 frames per second for PAL video) The maths are different for film (24 fps) and the US broadcast system NTSC (30 fps) but I want to focus on the 25 fps maths. So if you time a movement and it lasts 4.4 seconds then this means that it will be 110 frames long (4.4 x 25). The tricky part comes when your move ends in an odd number, say 4.3 seconds. 4.3 x 25 gives you 107.5 frames. But how can you have ½ a frame? The answer is you can’t, so you will either need to round it up or down. The other problem that comes up is timing a cycle. The standard walk cycle is generally 12 frames per step, but that means there will be 24 moves per second (2 steps at 12 frames each). What happens to the missing frame at the end, the one that takes you up to the full 25. The answer rather annoyingly is this – you have to swap between working in base 24 and base 25. It might sound complicated, but trust me, once you’ve got your head around the idea it’s ok. Frustrating at the time, but ok!

Martin-Pullen.-Still-from-Tom-Vicky-Granada-TVWizard-Animation
Once you’ve been animating for a while, and this might be a few years, you’ll find that you can rely purely on instinct and a feel for how much something needs to move through space, across a piece of paper or by a number of pixels. Timings can be dictated by the speed of delivery with dialogue and a common mistake is for any animator to not move with the speed of this, and let the animation lead and have the dialogue follow. This will always result in a miss-match. Or bad acting. Timing is paramount particularly with linear animation like stop motion or pixilation where there is little or no opportunity to go back and insert frames or stretch time-lines. This is really where it is vital to spend time timing and re-timing gestures. For non-linear animation such as 2D drawn or CG there is the opportunity to go back and correct work. However you should develop your timing skills and it is vital that at an early stage you learn the importance and relevance of timing. Too often fledgling animators can become reliant upon facilities such as tweening (where the program interpolates or works out the movements between two key frames) and as a result their timing skills never fully develop. Timing needs to become an instinctive thing – you look at a movement and you just know how long it is. Avoid being dictated to by the limitations and harnessing effects of tweening. Timing for animation should be directed by the animator alone and not driven by the tools used to execute the medium.
In my next tutorial we will look at the sort of characters that inhabit most storylines and how to unpick them so you get a better idea of how they need to move.